|
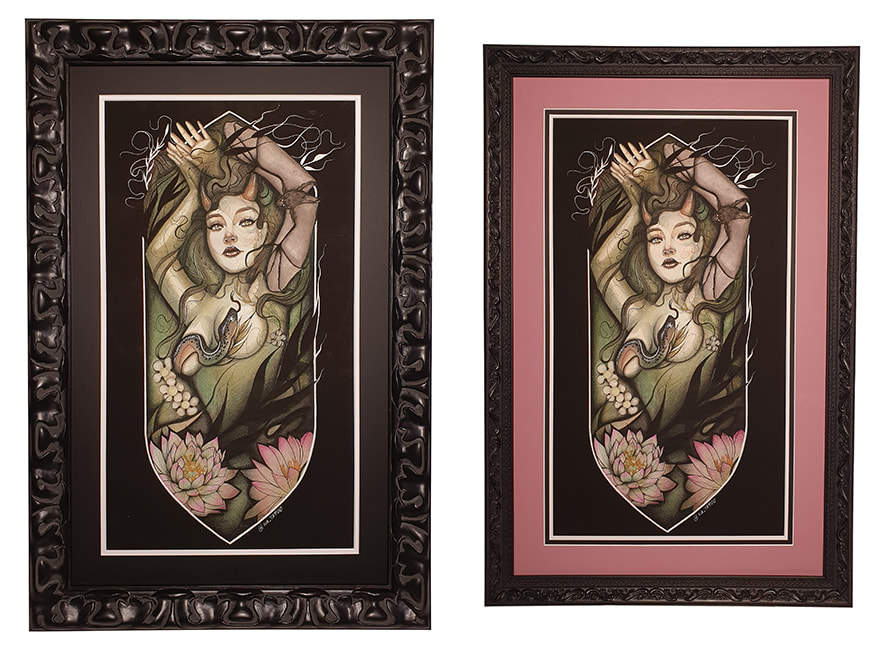
It's never been more important to the average customer to get BANG FOR THEIR BUCK than it is right now. Long term customers of ART 17 are going to know many of these design 'tricks' through previous framing, but for the uninitiated here's a quick guide to using matting to make your framed artwork POP and impress your friends on a budget!
Taking the images above as an example of framing the same print in two different yet equally AWESOME designs, you can see that the design on the left uses a large 'chunky' ornate frame and therefor did not need the matting to be ostentatious. A single black mat was perfect. The design on the right utilizes a smaller ornate frame and a double mat of pink and black to create layers using the colour of the frame and the image. Both look fabulous. There's no right or wrong when the framing looks great, it's all subjective! If you head to the ART 17 Instagram account (click the link at the top of the page) and go for a scroll you'll find over 1000 variations in matting layers, colours, shapes, even bevels.. Not only can you stack matboards to create layers around your image, you can vary the width of the matboard showing, the width of the overall border, whether the matboard is cut with a bevel or reverse bevel, and even the shape of the corner. ART 17 is FAMOUS for using ornate 'fancy' cut matboard corners to add OMFGGG to the design of your framing. If you'd like to organize a free no obligation consultation with the MAESTRO OF MATBOARD himself, ASH, click back to the HOME PAGE and fill in the contact form. Or head over to Instagram and slide into the DM's! UNTIL NEXT TIME...TAKE CARE AND STAY AWESOME! xo
0 Comments
Leave a Reply. |
AuthorAsh is the owner and Trade Qualified Custom Framer at ART 17 Archives
January 2024
Categories |
Automation Setup
Iron's “Automation” feature allows you to easily change the video background of the “Iron” page layout and the 3 text elements that lay on top of the video background.
Video Background URL
To change the video background on the "Iron" page layout, add the URL of a video to the input box below. You can use the URL of a video hosted on another server, or upload a video to your Weebly site by going to “Theme>Edit HTML/CSS>ASSETS>Videos”, click the gear icon, and then select “Upload File(s)...” to upload a video from your hard drive (e.g., /files/theme/videos/paint.mp4). The video format must end with “.mp4” and make sure to set the Theme Option "Video" to "Custom" to use your own video.
Video Background Text Input
To change the text that appears on top of the video background, add your text to the input boxes below.
Note: You can hide this box under "Theme>Theme Options>Automation [Editor Only]".
Need support? We've got your back!


 RSS Feed